Quick Start Guide
Write your first scene with AI in under five minutes.
Last updated October 2026
This guide walks you through writing your first AI-assisted scene. By the end, you'll understand the core workflow: write, generate, and review.
Step 1 — Create a Project
From the Project Hub, click New Project. Give it a title — something like “My First Story” is fine. Pick a genre (you can change this later). Click Create.
Step 2 — Add a Draft
Your project opens in the writer. You'll see an empty node tree on the left. Click the + button and select Draft. Name it something like “Chapter 1” or “Opening Scene.” Click to open it.
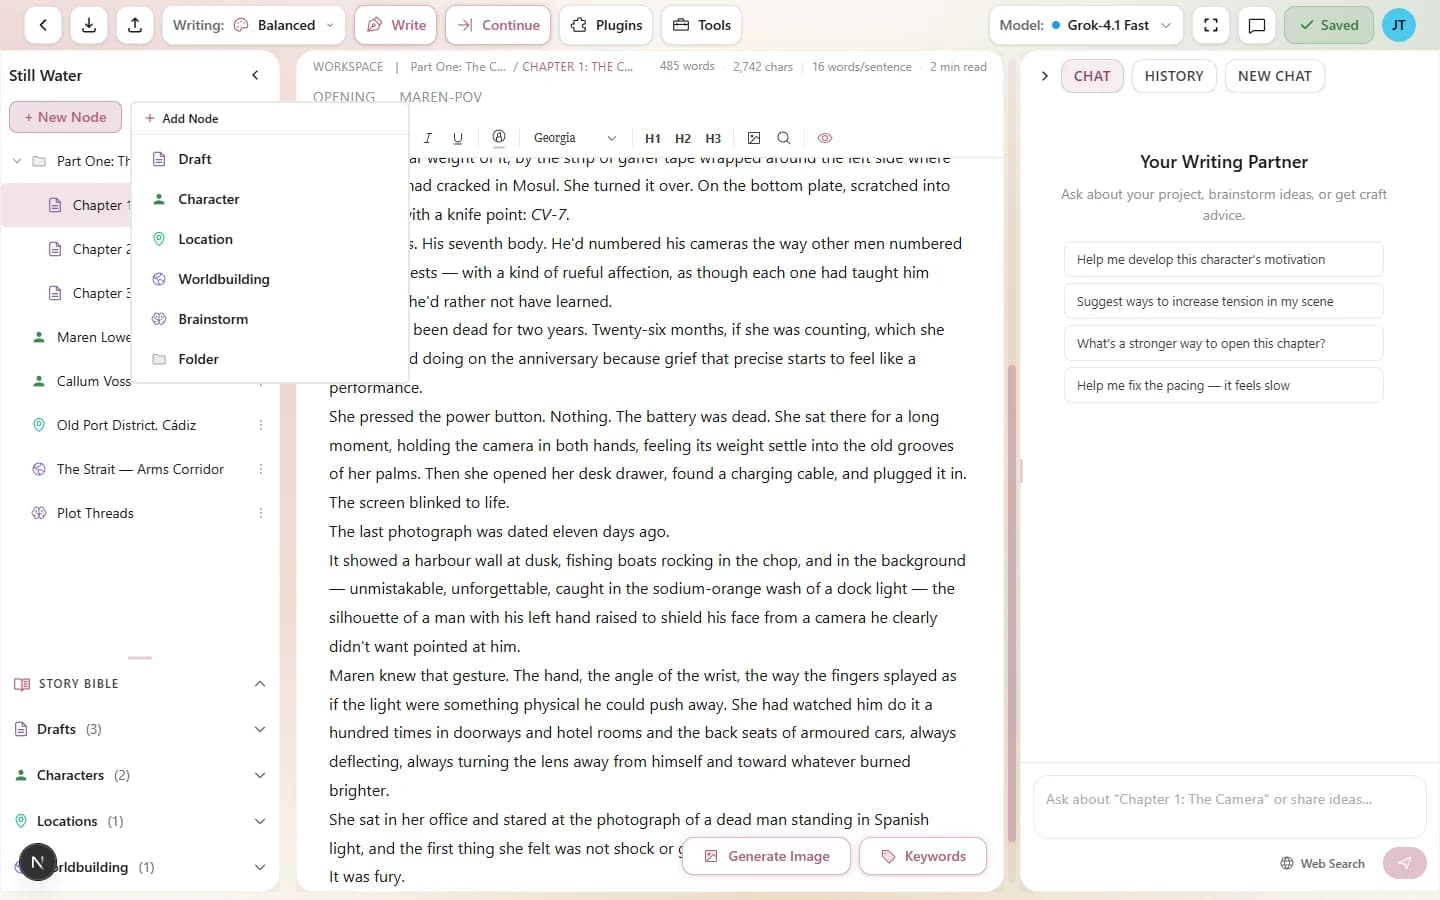
Click + to add a new Draft node to your project
Step 3 — Write Something
Type a paragraph or two in the editor. This gives the AI context to work with. It doesn't need to be polished — even a few sentences are enough. For example:
The rain hadn't stopped for three days. Maya pressed her forehead against the cold glass and watched rivulets race each other down the window. Somewhere in the fog, a church bell rang twice.
Step 4 — Generate with AI
Open Chat, the assistant in the right panel, and ask, in plain words: “Continue this scene.” The assistant reads your draft and your Story Bible, then writes a continuation in the voice you've started.
Step 5 — Reviewing AI Output
What happens next depends on how the assistant is set up:
- Chat — the prose arrives as a card in the chat. Read it, then choose Insert into draft to add it to the end of your chapter.
- Full access — the assistant writes the prose into the chapter itself and lists each change it made in the chat, each with its own Undo.
Want to see exactly what changed, or compare before and after? Open the Activity tab, which shows a word-level diff of every change.
Step 6 — Try Selection Tools
Now try transforming existing text. Select a paragraph (either yours or the AI's) and look at the selection toolbar that appears:
- Rewrite — rewrite the selected text with a fresh perspective.
- Expand — make the selected text longer and more detailed.
- Describe — add sensory details (sight, sound, smell, touch, taste).
- Polish — fix grammar and improve the prose quality.
On desktop, each tool returns its result as a card in the assistant chat, which you can read and apply to your draft.
What to Try Next
You've got the basics. Here are some features to explore:
- Choose a different AI model — each one writes differently. Try Claude for literary prose, or Grok for faster output.
- Create a character — give the AI a character to write with, and watch the prose become more consistent.
- Apply a writing style — change the AI's tone and voice to match your genre.
- Learn more about writing and continuing with Chat — context building and tips for better results.
- Keyboard shortcuts — speed up your workflow with hotkeys.